A profile picture is usually the first thing a recruiter, client or colleague sees, and it is displayed tiny — LinkedIn shows it at about 60 pixels wide in search results. That constraint drives every decision below.
You do not need a studio. A phone from the last five years, a window, and ten minutes will get you something that looks intentional.
Light is the whole game
The single biggest difference between a photo that looks professional and one that does not is lighting, not the camera.
- Face a window. Stand a metre or two back from a window with the light on your face, not behind you. Backlighting turns you into a silhouette that no editing recovers.
- Overcast is ideal. A grey day gives soft, even light with no harsh shadows. Bright direct sun creates hard shadows under the eyes and nose, which is the least flattering light there is.
- Never use the ceiling light alone. Overhead lighting drops shadows into the eye sockets and under the chin.
- Never use the on-camera flash. It flattens the face and creates a hard shadow outline behind you.
Use the rear camera
The front-facing selfie camera is lower resolution on almost every phone, and its wide lens distorts faces at arm's length — noses look bigger, ears look smaller. It is the reason selfies often feel subtly "off".
Prop the phone up, use the rear camera, and trigger it with the self-timer or a volume button. Stand about 1.5–2 metres away and zoom slightly if you need a tighter frame. That distance renders facial proportions naturally.
Get the lens roughly at eye level. Shooting from below emphasises the chin and neck; shooting from well above looks like a selfie taken at a party.
Background
Plain and uncluttered. A blank wall, a door, or anything far enough behind you to be out of focus. What you are avoiding is a background that competes for attention at thumbnail size — a kitchen, a bookshelf with readable titles, other people.
If the only wall available is busy, shoot anyway and fix it afterwards. Our background remover cuts you out and gives you a transparent PNG, which you can then place on a plain colour. It keeps fine hair detail, which is the part that normally gives a cut-out away — there is more on that in removing backgrounds around hair.
A light grey or muted blue-grey background reads as professional almost everywhere. Avoid pure white, which makes the photo look like a passport shot, and avoid strong colours that clash with whatever platform chrome sits around it.
What to wear and how to look
- Dress one step smarter than your normal working day.
- Solid colours photograph better than patterns; fine stripes and small checks can shimmer at low resolution.
- Avoid clothing close to your background colour — you will blend into it.
- A genuine, closed-mouth smile reads as approachable at small sizes. Try a real one: think of something specific rather than holding a pose.
- Shoulders angled slightly away from the camera, head turned back toward it, looks more natural than facing square on.
- Take thirty photos and pick one. Even professionals shoot dozens. Your third frame is rarely your best.
The crop matters more than you think
This is where most people go wrong. Profile pictures are displayed as circles on nearly every platform, so anything in the corners is cut away.
- Crop to a square (1:1). Anything else gets cropped for you, usually badly.
- Head and shoulders only. A full body shot shrunk to 60 pixels makes your face a smudge.
- Leave a little headroom — a small gap above the hair, not a large one.
- Put your eyes in the upper third. This one adjustment does more for a portrait than anything else. Eyes dead-centre looks static.
- Never crop at the neck. Include some shoulder so the head is not floating.
Our cropper has a 1:1 lock so you can crop to a true square without eyeballing it. Preview it small before you commit — shrink it to about 60 pixels and see whether you still read as you.
Size and file format
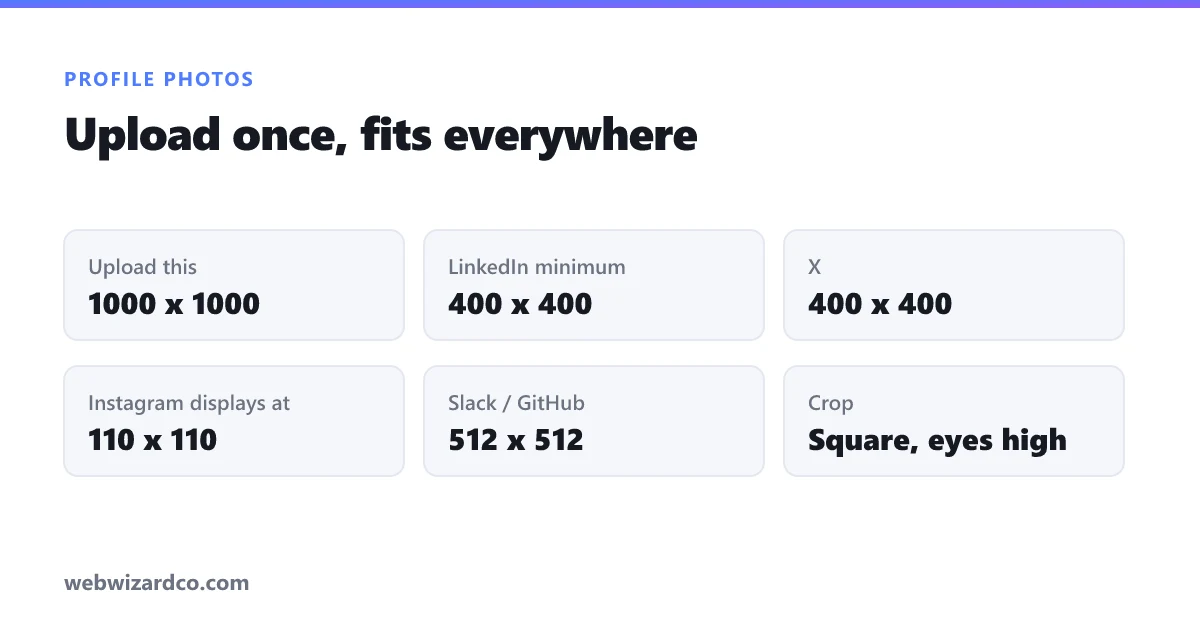
Upload a generous square and let each platform downscale it. Around 800 × 800 or 1000 × 1000 works everywhere and survives future redesigns.
- LinkedIn — 400 × 400 minimum, up to 7680 × 4320, 8 MB limit.
- X — 400 × 400, 2 MB limit.
- Instagram — displays at 110 × 110; upload 320 × 320 or larger.
- Facebook — 170 × 170 on desktop; upload larger.
- Slack, GitHub, Teams — 512 × 512 is comfortably enough.
Save as JPG at about 85% quality. If the file is over a platform's limit, compress it rather than shrinking the dimensions — at these sizes you have quality to spare. Exact dimensions for other platforms are in the social media size guide.
What to avoid
Heavy filters, sunglasses, a photo with someone else's arm cropped out of it, anything over five years old, and a picture of your dog. Each of these is common and each quietly costs you credibility in a professional context.
A ten-minute version
- Stand facing a window on an overcast day, plain wall behind you.
- Prop the phone at eye level, rear camera, two metres back, self-timer.
- Take thirty frames; pick the one where the smile looks real.
- Replace the background if it is cluttered.
- Crop square, eyes in the upper third, head and shoulders.
- Export at 1000 × 1000 JPG, 85% quality.